Changing the serial number in SOLIDWORKS is sometimes necessary when switching to a new license, upgrading to a different version, or troubleshooting activation issues. This guide will walk you through the steps to deactivate your old serial number and change to a new serial numbers without extensive uninstall and reinstallation steps.
NOTE: This blog will be referencing standalone licenses, not SOLIDWORKS Named User License licenses.
3DEXPERIENCE Named User License offers various ease of admin functionalities, such as simplified log-in access, and up-to-date installation/update processes. To compare, access the Getting Started with 3DEXPERIENCE SOLIDWORKS guide.
Topics covered in this post:
- 1. Possible Reasons You May Need to Change Serial Numbers
- 2. How to Deactivate a SOLIDWORKS Installation
- 3. Modifying the Installation to Include the New Serial Numbers
- 4. How to Activate the New SOLIDWORKS Serial Numbers
Why Change Your SOLIDWORKS Serial Number?
You may need to update your SOLIDWORKS serial number in the following scenarios:
- Switching from a standalone to a network license (or vice versa).
- Upgrading or downgrading your SOLIDWORKS edition (e.g., from Standard to Professional).
- Moving SOLIDWORKS to a new computer.
Steps to Change Your SOLIDWORKS Serial Number
Step 1: Deactivate the Existing License
Before entering a new serial number, it is recommended to deactivate the current license. You can see this article for more detailed steps. If the license previously used is not active anymore you can skip this step.
-
Open SOLIDWORKS and navigate to the Help menu ("?" icon in the top right).
-
Click on Licenses > Deactivate Licenses.

-
The SOLIDWORKS Product Activation window will appear. Select the products you want to deactivate and click Next.
-
Choose the deactivation method (Automatically over the Internet is recommended) and follow the prompts.
-
Enter your email when prompted and complete the process.
-
Once deactivation is complete, you’ll receive a confirmation message. Click Finish.
Step 2: Modify the Installed Serial Number
Now that the old serial number is deactivated, update SOLIDWORKS with the new one.
-
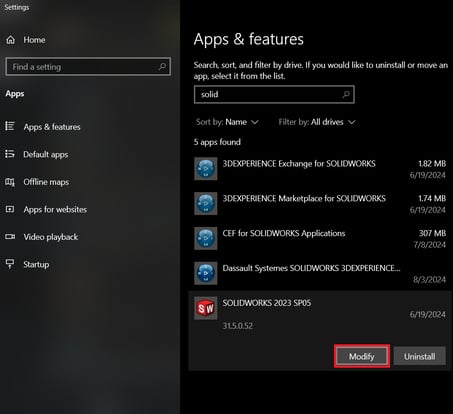
Open Windows Control Panel and navigate to Add/Remove Programs.
-
Find the LATEST INSTALLED VERSION OF SOLIDWORKS Standalone in the list and select Modify. For instance, if you have SOLIDWORKS 2023 and 2026 installed, modify the 2026 installation.
-
In the SOLIDWORKS Installation Manager, choose Modify your installation and click Next.
-
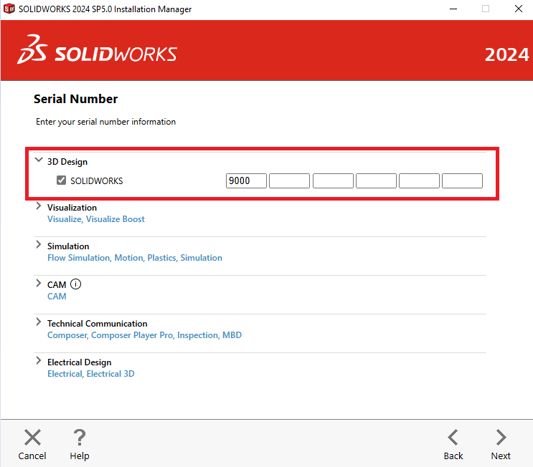
In the Serial Number section, delete the old number and enter the new one. If there are any numbers that will no longer be used, be sure to clear them out and de-select the associated checkmark.
-
Click Next and follow the installation prompts to update the configuration
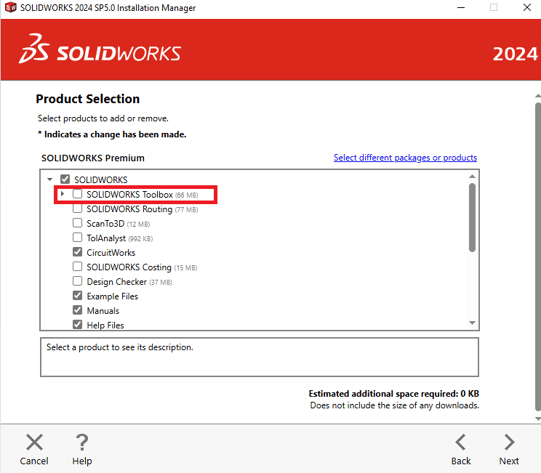
NOTE: If you are gaining access to a new feature, such as Visualize or Toolbox, please be sure to click the associated checkbox in the next screen to download and add the serial number to install features you’d like to include. Then click Next again to continue the installation modification process.
- Once all settings are per your preferences (if you're only changing serial number and nothing else, you can leave the settings as they were), accept the license agreement and click on Modify Now.
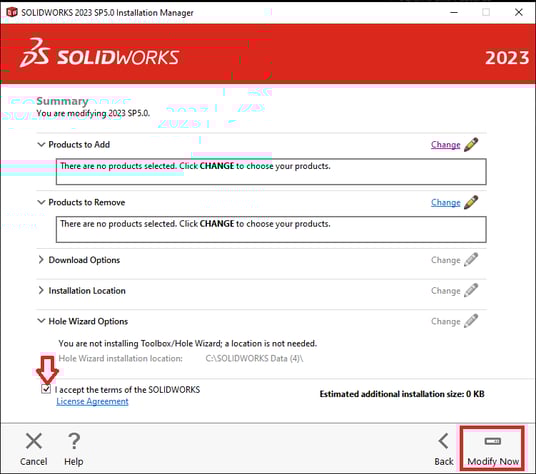
Note: If you receive an error message stating "The source folder is not versioned properly", please see this article for steps to resolve, then return to the Installation Manager to continue.
Step 3: Reactivate SOLIDWORKS with the New Serial Number
Once the new serial number is in place, reactivate the license.
-
Open SOLIDWORKS from your desktop shortcut or Windows search.
-
The SOLIDWORKS Product Activation window will appear. Select ‘I want to activate my SOLIDWORKS product now’
-
Select the products to activate and click Next.
-
Choose the activation method (Automatically over the Internet is recommended), enter your email, and proceed.
-
Once activation is successful, you’ll receive a confirmation message. Click Finish, and your new SOLIDWORKS serial numbers should be good to go!
- See this article for more information on Activating your SOLIDWORKS installation
- See this article for more information on Activating your SOLIDWORKS installation
For further assistance, please contact the SWYFT Support team at support@swyftsol.com and we’ll be happy to assist.