SOLIDWORKS Design is a powerful 3D CAD software used for product design, engineering, and manufacturing. Whether you're designing individual parts or complex assemblies, SOLIDWORKS provides a robust environment for creating, simulating, and validating your designs.
In this article, you’ll learn the steps to install SOLIDWORKS Design for a standalone license, which allows the software to be installed and activated on a single computer. We’ll walk through downloading the installation files, running the setup, and activating the product.
Once complete, you’ll have a fully operational installation of SOLIDWORKS, ready to bring your ideas to life!
Before You Begin
SOLIDWORKS offers multiple license types, and the installation steps differ depending on which one you use.
To ensure you follow the correct process, first confirm your license type:
-
Standalone License – activated on a single device and managed with a serial number
-
Named User License – tied to a user account and managed with a log-in rather than tied to one computer
- Network License – managed through a SolidNetWork License Manager on a server and shared across multiple users
This guide reviews the installation steps if you have a Standalone License.
Prerequisites
-
You have local administrator privileges on the computer.
-
You have a valid SOLIDWORKS Design standalone license serial number.
-
Your system meets the SOLIDWORKS System Requirements.
- You have either...
- have created your 3DEXPERIENCE username and password, or
- have created a SOLIDWORKS ID
1. Obtain Installation Files
-
Access the SOLIDWORKS Downloads portal.
-
Log in with your SOLIDWORKS ID, (or create an account if you do not already have one).
- Click Access Downloads
-
Select the version year you would like to install and select Download.
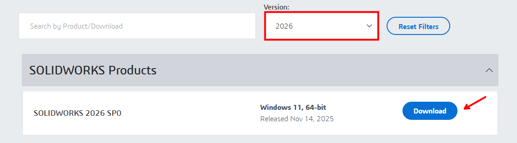
-
Scroll through the End User Agreement and select Accept and Continue.
NOTE: If you are presented with a message stating Subscription Confirmation Needed upon attempting to access the Downloads center, have your organization’s Security Administrator add you as a contact to your organization’s Site.
If you are unsure of who this is, contact your Value Added Reseller's (VAR) support team. If your licenses are supported by SWYFT Solutions, contact support@swyftsol.com.

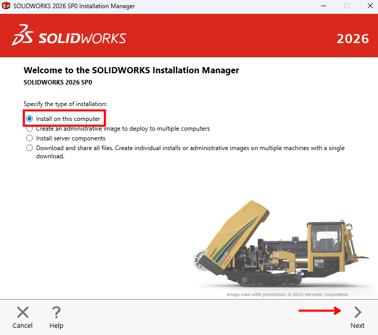
2. Launch Installation Manager
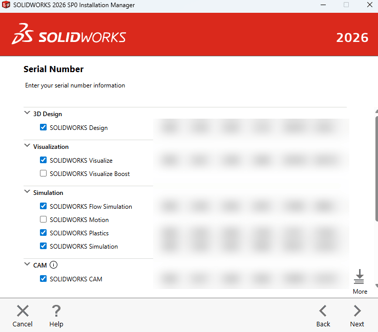
3. Enter Serial Number(s)
-
Toggle the checkbox for SOLIDWORKS Design and any add-ons that you have licenses for, and enter the serial number(s).
-
Select Next.
TIP: If you do not have your serial number(s) on hand, you can access an up-to-date list in the SOLIDWORKS MyProducts Administrator Portal.
This is only visible by your organization's Security Administrator. If you are unsure of who this is, contact your Value Added Reseller's (VAR) support team. If your licenses are supported by SWYFT Solutions, contact support@swyftsol.com.
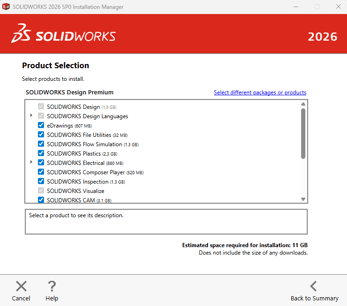
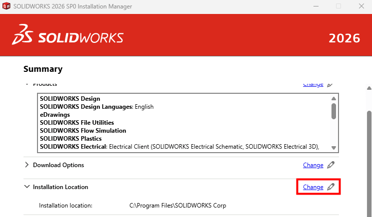
4. Select Products to Install (Optional)
-
Select Change in the Products section of the Summary page.

-
Confirm the selections of the products you would like to have installed.
-
Select Back to Summary.
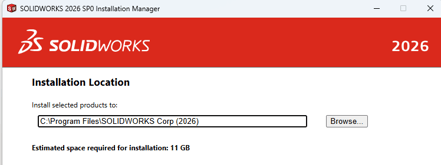
5. Specify Installation Location (Optional)
If you are planning on having multiple version years of SOLIDWORKS installed on the same computer simultaneously, it is recommended to add a unique identifier to the installation directory to aid in troubleshooting in the future.
-
Select Change in the Installation Location section of the Summary page.
-
Add the version year in parentheses to the end of the installation location.
-
e.g., C:\Program Files\SOLIDWORKS Corp (2026)
-
-
Select Back to Summary.
6. Complete Installation
-
Read the user agreement and toggle the checkbox for I accept the terms of the SOLIDWORKS License Agreement.
-
Select Download and Install.

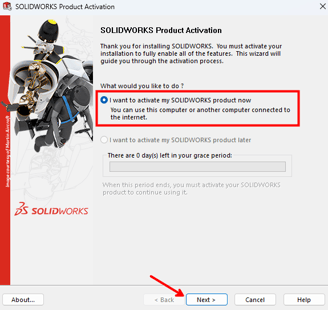
7. Activate License
-
Launch SOLIDWORKS Design by clicking on the Desktop icon.
-
The first time you launch, toggle the radio button for I want to activate my SOLIDWORKS product now and select Next.
-
Select the product(s) you would like to activate.
-
Toggle the radio button for Automatically over the Internet (recommended).
-
Enter your email address.
-
Select Next.
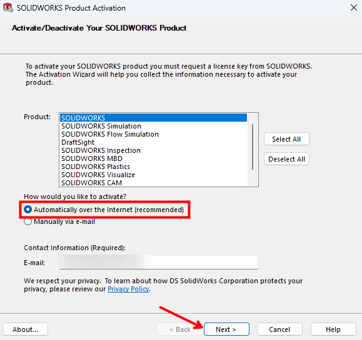
- Once activation is complete, you should be able to launch SOLIDWORKS Design like normal by clicking on the desktop icon!
Installing the Design with SOLIDWORKS Connector App
Please note: the Design with SOLIDWORKS Connector app is part of your SOLIDWORKS with Cloud Services package - it is not required to install this to use the base program functionality. However it is required if you would like to access the Product Lifecycle Management portion of your Cloud Services, and also required for certain functionality such as Share and Markup or opening Creo/CATIA/Etc files natively.
- Please see the following Knowledgebase article for clear steps on how to install Design with SOLIDWORKS
How to Install Design With SOLIDWORKS
Need help with installation?
If SWYFT Solutions is your Value-Added Reseller (VAR), our support team is happy to help you get up and running. You can email us at support@swyftsol.com, or call us at 616-631-3044 and ask for tech support.
If your licenses are supported by a different partner, don’t worry, their support team will be the best point of contact for assistance specific to your account!