Important note: Starting November 15th, 2025, SOLIDWORKS has updated its product names. This article applies to SOLIDWORKS Design Named User Licenses. If you were using 3DEXPERIENCE SOLIDWORKS (formerly known as SOLIDWORKS Connected), you can continue with these instructions, as the steps will be the same.
Note: While this process generally retains all customizations and file paths, it is a good idea to back up your settings prior to uninstallation, just in case.
Step 1: Uninstall Existing Installation of SOLIDWORKS Design (If you do not have SOLIDWORKS installed yet, you can skip to Step 2 below).
- Open Add or Remove Programs in Windows Settings.
- Locate Dassault Systemes SOLIDWORKS Design
- Uninstall the existing SOLIDWORKS Design (Labeled "Dassault Systemes SOLIDWORKS 3DEXPERIENCE)

- You can see this article for more advanced uninstallation steps, though generally for this step, the standard uninstall as described above is adequate.
- You can see this article for more advanced uninstallation steps, though generally for this step, the standard uninstall as described above is adequate.
Step 2: Reinstall SOLIDWORKS Design
NOTE: If you encounter an issue where your 3DEXPERIENCE Launcher repeatedly asks you to install, please see this article for quick steps to resolve this behavior.
- You can follow the standard installation instructions for SOLIDWORKS Design Named User License.
- Carefully click through the Installation Wizard and locate the page that allows you to select add-ins. It will look similar to below
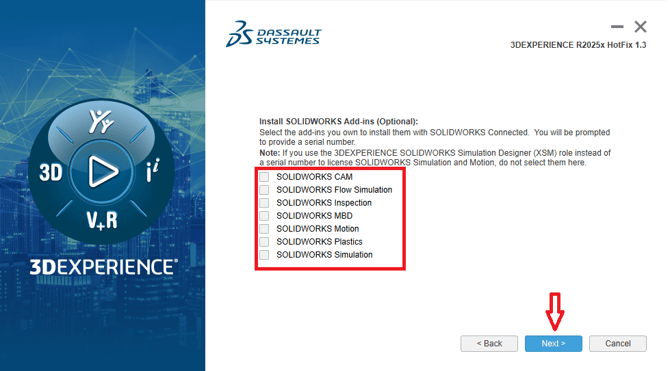
- Check the add-ins that you have serial numbers for (i.e. SOLIDWORKS Simulation) and click next, then enter the appropriate serial number when prompted. If you are unsure if you need a serial number, contact your Value Added Reseller (VAR).
- Complete the installation.
Step 3: Activate the Add-in License(s)
- Launch SOLIDWORKS Design
- Go to the Help menu (question mark icon) in the top-right corner.
- Hover over Licenses and select Activate.
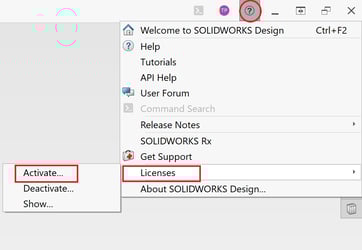
- Follow the prompts to activate the new Add-in license, or you can follow these instructions.
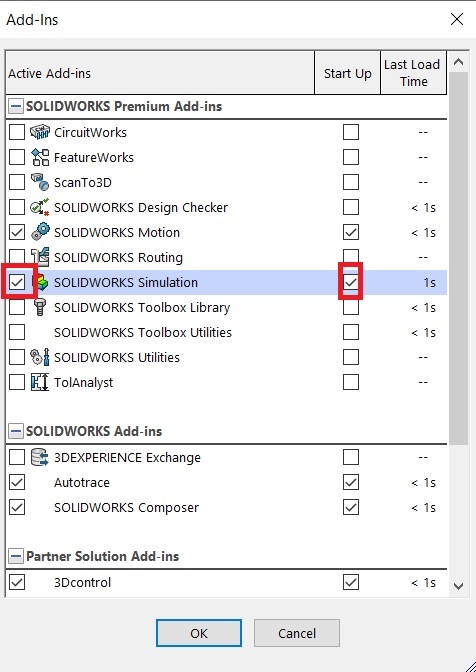
Step 4: Turning on the Add-ins in SOLIDWORKS
- Once the licenses are activated, the final step is to enable the add-in you are looking for is not readily available, go to Tools --> Add-ins and select the appropriate check-box associated with the add-in you'd like to use, and include the 'start up' checkbox if you'd like it to load every time.
Useful Links:
- Resolving the Incomplete Installation found error
- Activating your new Add-in licenses
- Backing up your user settings and custom file paths
For further assistance, please contact the SWYFT Support team at support@swyftsol.com and we’ll be happy to assist.